Can You DIY a Concrete Driveway Installation?
You can install a concrete driveway yourself if you’ve got the right skills and tools. Start by evaluating your experience with concrete and precision tasks. Gather necessary tools like gloves, a concrete mixer, and measuring devices. Clear and prepare the site, ensuring the ground is level. Mix and pour the concrete evenly, following the manufacturer’s guidelines for strength. Finish by smoothing and texturing the surface for durability and safety. It’s a big job, but if you’re prepared and detail-oriented, it’s achievable. Learn more about the steps and tips to make your project successful.
Assessing Your Skills
Before you begin your DIY concrete driveway Cincinnati, OH project, it’s vital to honestly assess whether you have the necessary skills and experience. Concrete work isn’t just about mixing and pouring; it involves precise measurements, leveling, and finishing techniques that can make or break your project.
Start with a thorough self-assessment. Have you ever worked with concrete before? If yes, was it on a similar scale? Skill evaluation is important here. Evaluate whether you can handle tasks like setting up forms, mixing concrete to the right consistency, and ensuring proper drainage. If you haven’t done these before, you might find the project overwhelming.
Ask yourself if you’re comfortable using tools like trowels, screeds, and floats. Can you dedicate the needed time and physical effort? Also, consider any past DIY projects. Did those require precision and attention to detail? If you struggled with those, a concrete driveway might be too ambitious.
Be brutally honest during your self-assessment. Remember, even a small mistake can lead to costly repairs down the line. If you feel uncertain about your skills, consulting a professional might be a wiser choice.
Gathering Necessary Tools
To get started on your DIY concrete driveway, you’ll need to gather all the necessary tools to make sure the project runs smoothly. Begin by making certain you have the right equipment and that everything is in proper working order. Tool maintenance is vital; you don’t want to find out a critical tool is broken halfway through the job.
First, gather your safety gear. Proper safety gear is essential; you’ll need it to protect yourself from potential hazards. This includes:
- Gloves – to protect your hands from rough materials and concrete mix.
- Safety glasses – to shield your eyes from dust and debris.
- Sturdy boots – to safeguard your feet from heavy objects and uneven surfaces.
Next, you’ll need construction tools like shovels, wheelbarrows, and concrete mixers. A concrete mixer can save you a lot of time and ensure a consistent mix. Don’t forget measuring tools like tape measures and levels, which are important for accuracy.
Preparing the Site
Start by clearing the area of any debris, vegetation, or old pavement to guarantee a smooth and stable base for your new concrete driveway. Site clearance is essential to make sure there’s nothing in the way that could compromise the integrity of your driveway. Use a shovel or a heavy-duty rake to remove rocks, roots, and any other obstructions. If you’re dealing with old pavement, a sledgehammer or a jackhammer might be necessary to break it up.
Once the site is clear, conduct soil testing to determine the type of soil you’re working with. This step is vital because the soil’s properties affect the driveway’s ability to support the concrete. You can purchase a soil test kit from a local hardware store or hire a professional to perform the test. Look for issues like poor drainage or overly sandy soil, which may require additional preparation, such as adding a layer of gravel.
After soil testing, level the ground using a rake and tamper. This ensures your driveway has a uniform surface for the concrete. Proper site preparation can’t be overlooked; it lays the groundwork for a durable, long-lasting driveway.
Pouring the Concrete
Begin pouring the concrete by evenly distributing it across the prepared site to guarantee a consistent thickness. Start from the far end and work your way back, making sure that you maintain an even spread. Use a rake or a shovel to move the concrete around and fill any low spots.
When it comes to mixing ratios, make sure you closely follow the manufacturer’s guidelines. The correct ratio of cement, sand, gravel, and water is vital for the strength and durability of your driveway. Too much water can weaken the concrete, while too little can make it hard to work with.
Here are three key steps to keep in mind:
- Mix thoroughly: Ensure the components are evenly mixed to avoid weak spots.
- Pour quickly: Concrete can start to set within hours, so you need to work efficiently.
- Avoid overworking: Excessive manipulation can lead to segregation of the components.
Once poured, the curing process begins. This is essential for achieving maximum strength. Keep the surface moist by lightly spraying it with water and cover it with a plastic sheet to retain moisture. Curing typically takes around 28 days, so patience is key. Proper curing ensures a durable and long-lasting driveway.
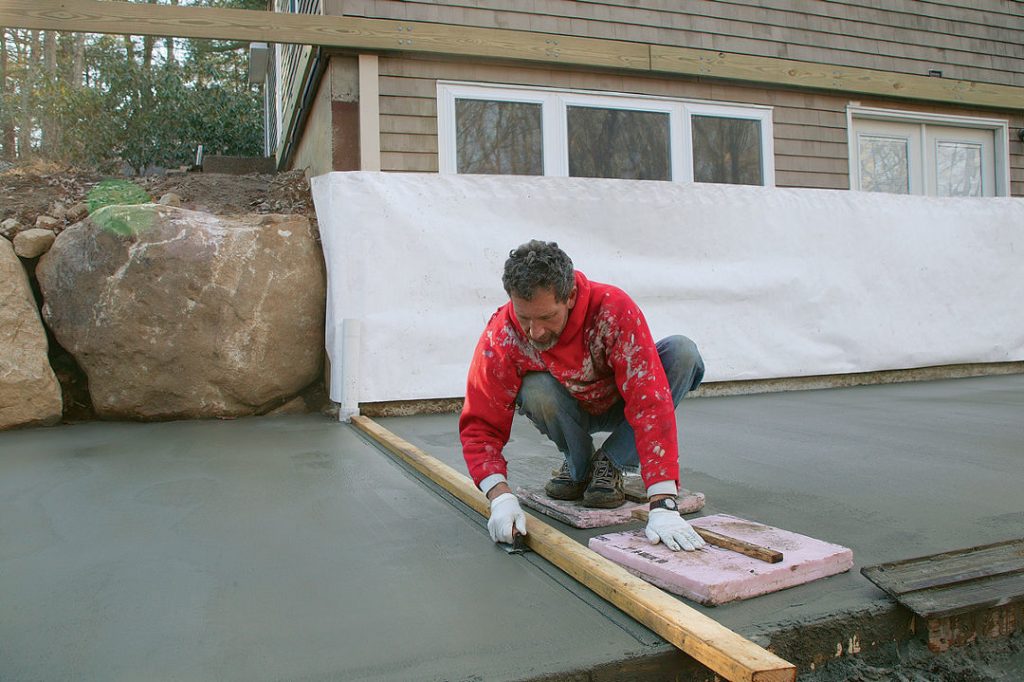
Finishing Touches
Now that the concrete is curing, it’s time to focus on the finishing touches that will enhance the appearance and longevity of your driveway. During the curing process, it’s important to make sure the surface remains smooth and even. Start by using a magnesium float to level out any high spots and fill in low areas. This step is vital for achieving a smooth and professional-looking finish.
Next, use a steel trowel to further refine the surface. The trowel helps to compact the concrete, making it denser and more resistant to wear and tear. Be sure to work in small sections to maintain control and consistency.
After troweling, consider adding texture to the surface to improve traction and prevent slipping. A broom finish is a popular choice; simply drag a broom across the surface to create fine lines. This step not only enhances safety but also adds a touch of visual interest.